
TM 5-4220-211-12&P
f.
Compressor Drive Belt Inspection. Inspect compressor drive belt (9, Fig. D-2) as follows:
Do not operate compressor while inspecting, replacing or adjusting drive belt.
(1)
Visually inspect drive belt for fraying, wear, cracks, or other damage. Replace if defective. Ref. Par. 4-
4.
(2)
Check drive belt tension by pushing down on the belt midway between the engine and compressor
sheaves. The belt should deflect no more than about 11/2" (38 mm). Adjust as required. Ref. Par. 4-4.
g.
Compressor Drive Belt Replacement. Replace the compressor drive belt (9, Fig. D-2) as follows:
Do not operate compressor while installing or adjusting drive belt.
Serious injury or
equipment damage may result.
(1)
Remove belt guard (21, Fig. D-2)
(2)
Loosen (4) compressor mounting nuts (45, Fig. D-2).
(3)
Slide compressor toward engine to release drive belt tension.
(4)
Remove drive belt (9, Fig. D-2) from compressor and engine drive sheaves.
(5)
Assemble new drive belt (9, Fig. D-2) over engine and compressor drive sheaves.
(6)
Pull compressor away from engine and tighten compressor mounting nuts while pulling compressor.
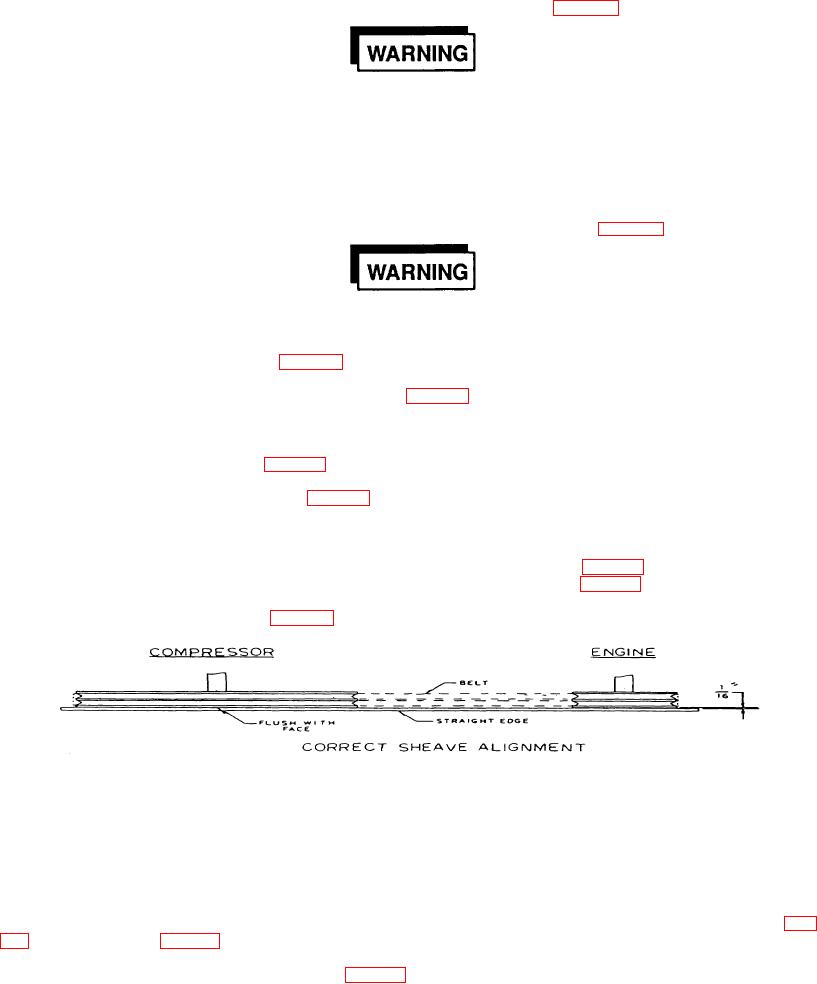
(7) Use a straight edge against the engine and compressor sheaves (Fig. 4-1). Rotate the compressor
about its vertical axis to align the sheaves. Secure the mounting nuts (45, Fig. D-2).
(8)
Replace belt guard (9, Fig. D-2).
Figure 4-1. Compressor Unit Sheave Alignment
h.
Air Tubing Inspection. Inspect air tubing as follows:
(1)
Visually inspect all air tubing and fittings for damage. Replace damaged tubing or fittings.
(2) Start compressor to pressurize all fittings.
Inspect with soapy water solution to locate air leaks.
Depressurize and repair all leaks.
i.
Intercooler and Aftercooler Cleaning and Inspection. Clean and inspect the intercoolers (13 and 20, Fig.
(1)
Clean intercooler coils (13 and 20, Fig. D-8) using a soft brush or low pressure air.
4-4