TM 5-4220-231-14&P
4-40 Low Pressure
(LP) Hose Assembly.
This task covers:
Replace
-
Hose Assembly
Between Volume Tank and Volume Tank Panel Fittings.
INITIAL SETUP
Tools
Equipment
Condition
General
Mechanics
Tool Kit
Open drain valve to release
any pressurized
air
from volume tank.
Materials/Parts
References
Low Pressure
Hose assembly,
13229E4656
Para 3-13, Maintenance
and Reentry Control Procedures
O-Ring, M83248/2-11
1 (2)
Nonionic Detergent Solution (NID), GP (Item 17, Appendix E)
Silicone Compound
(Item 9, Appendix D)
a.
Remove
PANEL
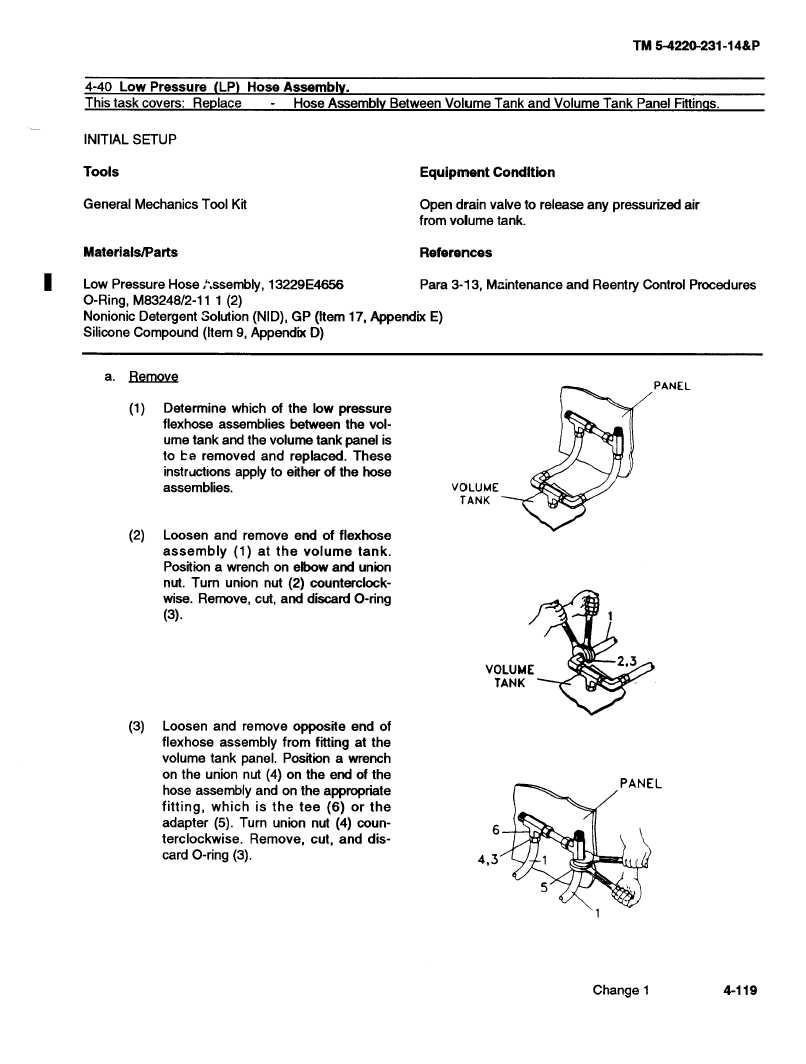
(1)
Determine
which of the low pressure
flexhose
assemblies
between
the vol-
ume tank and the volume tank panel is
to be removed
and replaced.
These
instructions
apply to either of the hose
assemblies.
VOLUME
TANK
(2)
Loosen
and remove end of flexhose
assembly
(1) at the volume
tank.
Position a wrench on elbow and union
nut. Turn union nut (2) counterclock-
wise. Remove, cut, and discard O-ring
(3).
VOLUME
2.3
TANK
(3)
Loosen
and remove
opposite
end of
flexhose
assembly
from fitting at the
volume tank panel. Position a wrench
on the union nut (4) on the end of the
PANEL
hose assembly
and on the appropriate
fitting, which is the tee (6) or the
adapter
(5). Turn union nut (4) coun-
6
terclockwise.
Remove,
cut, and dis-
card O-ring (3).
4,3
Ej
2.
@3
@5
Change 1
4-119


