TM 5-4220-231-14&P
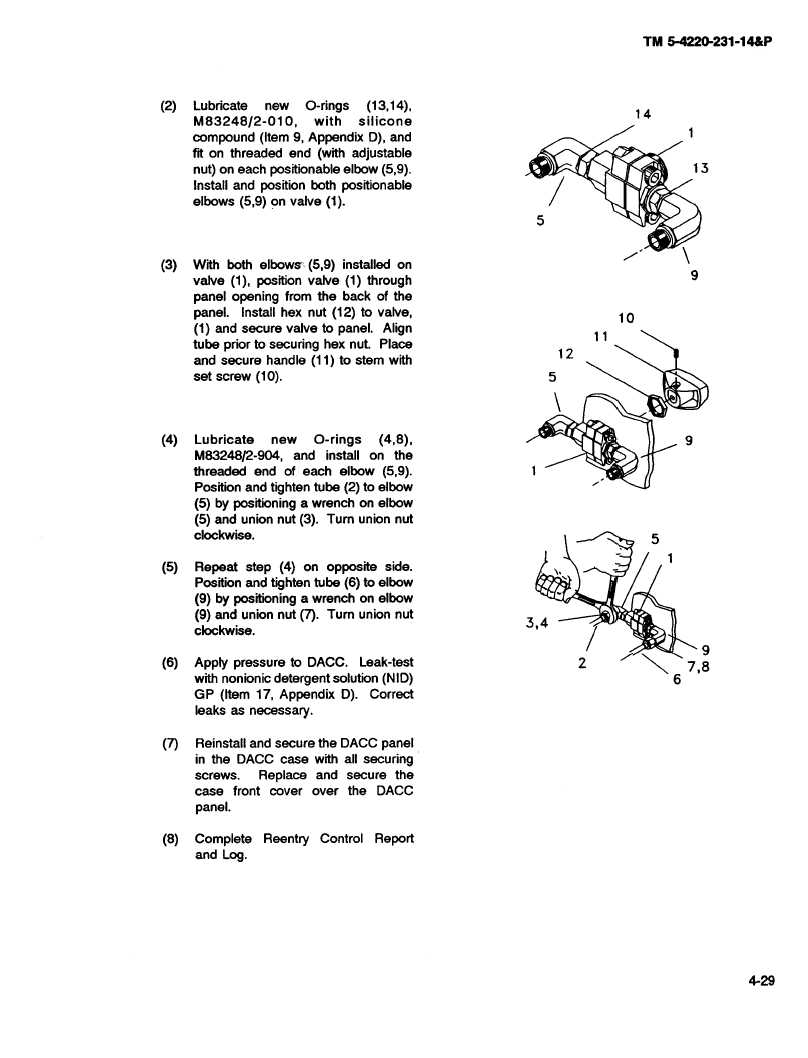
(2)
Lubricate
new
O-rings
(13,14),
14
M83248/2-010,
with
silicone
compound
(Item 9, Appendix D), and
fit on threaded
end (with adjustable
nut) on each positionable
elbow (5,9).
13
Install and position both positionable
elbows (5,9) on valve (1).
5
(3)
With both elbows
(5,9) installed
on
valve (1), position valve (1) through
9
panel opening
from the back of the
panel.
Install hex nut (12) to valve,
10
(1) and secure valve to panel.
Align
tube prior to securing
hex nut. Place
12
and secure handle (11) to stem with
set screw (10).
5
(4)
Lubricate
new
O-rings
(4,B),
9
M83248/2-904,
and
install on the
threaded
end of each elbow (5,9).
1
Position and tighten tube (2) to elbow
(5) by positioning a wrench on elbow
(5) and union nut (3). Turn union nut
clockwise.
5
(5)
Repeat
step
(4) on opposite
side.
V
Position and tighten tube (6) to elbow
(9) by positioning
a wrench on elbow
(9) and union nut (7). Turn union nut
3,4
clockwise.
9
(6)
Apply pressure
to DACC
Leak-test
2
7,8
with nonionic detergent
solution (NID)
6
GP (Item 17, Appendix D). Correct
leaks as necessary.
(7)
Reinstall and secure
the DACC panel
in the DACC case
with all securing
screws.
Replace
and secure
the
case
front cover over the DACC
panel.
(8)
Complete
Reentry
Control
Report
and Log.
45
,4
4-29